Zungo - Creative Consulting Business WordPress Landing Page Theme
Zungo is a Consulting and Professional Services Unbounce Pack. If you want to create a website for business consulting, marketing consulting, investment consultants, advertising consulting, financial advisors, insurance brokers, HR consukting or any type of small and medium agencies then businez will be the best choice. Zungo is build using bootstrap 5. Its highly creative and responsive template.Zungo is a complete and conclusive package with all the modernized features and functionalities. It also takes good care of your online presence and promotion with its fully edge-to-edge fitting display on all devices, lightweight, streamlined coding and the use of other advanced SEO practices. Meanwhile, the premium built-in plugins and ready-to-use widgets save you a lot on technical, practical and financial aspects.
By: Codeliono
Instruction
You need to unzip the downloaded zip file and upload only the ”zungo.zip” otherwise theme installation will fail with the following error:The package could not be installed. The theme is missing the style.css stylesheet.
Another common warning is “Are you sure you want to do this?”
This means the server has a limit on the file size that can be uploaded. Either have your host increase the limit or do a manual installation via FTP as shown in OPTION 1 below.
Step 1 WordPress installation
To install this theme, you must have a working version of WordPress already installed on your server. WordPress is well-known for its ease of installation. https://wordpress.org/support/article/how-to-install-wordpress/. Please visit this link for installing WordPress.
Step 2 Installation Through Dashboard (Easy)
Log in to the WordPress Dashboard. Go to Appearance->Themes. Click on Add New Button. Click on Upload Theme Button. Search zungo theme zip file from your computer Click on Install tab and Activate it Now your zungo theme is ready to Use

Step 3 Manual Installation using FTP (Advanced)
First download a zip file from our ThemeForest Account. Unzip theme file at your PC. Access your host web server using your favorite FTP client (such as FileZilla etc). Upload theme folder inside public_html/wp-content/themes/ and Do not change directory/folder name. Log into your WP admin paneland click on the Appearance->Theme tab.Now click on the zungo theme to activate it.
Importing the Demo Content
install all required Plugins Before Start Setup.

After Activate Your Theme Log in to the WordPress Dashboard.
Go to Appearance->Setup.
STEP 1: Click Get Started to start the Easy Setup wizard.

STEP 2: Click Import Content to import Dummy Content
Congratulations! Now you have completed Installing Plugins & Importing Demo Content
Note:After importing the demo, please save CubeWP Settings once.
Header,Footer,Logo Settings
Now you can select different header,footer and different logo for different pages you just edit your desire page and select it from page options
select header style.

Upload desire logo.

Select Footer style.

How To Add Custom Css
Using the Customizer: you can easily add new css or update existing one
Step 1: Go to your WordPress admin dashboard.
Step 2: Navigate to "Appearance" -> "Customize".
Step 3: Look for the "Additional CSS" or "Custom CSS" option.
Step 4: Click on it and enter your custom CSS code.
Step 5: Save the changes, and the custom CSS will be applied to your theme.
see below screenshot

How Forms Work
All the forms used in this theme is custom made and with ajax submission when somebody will submit form mail will be send to the admin email address which used when register on wordpress
you can see that email by following below steps
Log in to your WordPress admin area.
Go to "Settings" from the left-hand menu.
Click on "General" from the submenu.
On the General Settings page, you will find the "Email Address" field. The email address entered in this field is typically used as the admin email address for your WordPress site.
you can also change that email address
How to Add New Fields In form
if you want to add new fields in exisiting form you need to do custom work if you have some knowledge about coding it will be easy
you just need to change code in two files below is the file path
1:- themes\zungo\cube\classes\elementor\class-cubewp-elementor-banner.php
2:- themes\zungo\templates\single-ajax.php
SetUp Primary Menu
STEP 1: Go to Appearance > Menu
STEP 2: Create the Primary menu if it’s not created already

STEP 3: Add your menu to the Primary menu
STEP 4: Click on the Primary option

STEP 5: Save Changes
see screenshot where it shows

What’s included in item support?
Any kind of extortion or blackmailing or threatening prior or after posting a negative review, in return for any of the following but not limited to:
1) Free Customization work
2) Integration with 3rd Party Plugins that we do not support.
3) Resolving conflict with a 3rd Party Plugin whether it’s technical or design including CSS related.
4) We do not provide support for customization work made by you or your developer or any third-party service. Will be reported to Envato for further legal action and the support contract will be immediately terminated. We will not hesitate to take legal action against such a person or group of personsAlso please be advised that we do not provide support to businesses wеbѕitеѕ thаt deal with including (but nоt limitеd to) Gаmbling, Alсоhоl, Pоrn, Escort Sеrviсеѕ, Prostitution, Drugѕ, and Rасiѕm.
Envato Official Policy
What’s included in item support
What’s not included in item support
Sole Discretion
Nevertheless, at our sole discretion, we may provide you with free customization depending on the request and the availability of resources and time. We have the full right to accept or reject the request for free customization.
Indеmnifiсаtiоn
Uѕеr аgrееѕ to defend, indеmnifу, аnd hоld hаrmlеѕѕ, Codeliono itѕ соntributоrѕ, аnу еntitу jointly сrеаtеd by them, thеir rеѕресtivе affiliates аnd thеir rеѕресtivе dirесtоrѕ, оffiсеrѕ, еmрlоуееѕ, аnd аgеntѕ frоm аnd аgаinѕt all сlаimѕ аnd еxреnѕеѕ, inсluding аttоrnеуѕ’ fееѕ, аriѕing out оf thе uѕе оf thе оn-linе ѕеrviсе bу uѕеr оr uѕеr’ѕ ассоunt.
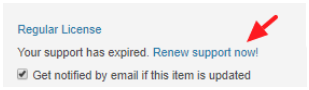
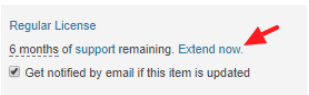
How to Renew an Expired Support?
Once the support is expired you must renew your support in order for our support engineer to be able to respond to your technical support-related questions. Also note that all support queries are answered only via the help desk, and not via the ThemeForest comments page or any email.
In order to extend or renew an item’s support offering, you must have less than 6 months of the existing support period remaining.
To renew the support component on an item, please follow these steps:
STEP 1: Log in to your Envato Account
STEP 2: Hover over your username and click Downloads from the drop-down menu.
STEP 3: The download section displays a list of all the items purchased using your account.
STEP 4: Click on Renew support now! or Extend now next to the item you wish to renew the item support for.
See screenshot below
Home Page Setup
when you import demo content your home page setup automatically if you want to change home page style then go to
Settings-->Reading
select your desire home page from dropdown

Edit Home Page
go to
wordpress backend >> pages
edit which ever page your want with elementor
General Options
After activate your theme and Cube Framework plugin go to CubeWp > CubeWp Setting > General you can set your theme general options like colors etc.

Header Options
After activate your theme and Cube Framework plugin go to CubeWp > CubeWp Setting > Header you can set your logo etc from there kindly see attached screenshot

Footer Options
After activate your theme and Cube Framework plugin go to CubeWp > CubeWp Setting > Footer you can set footer options there

PLEASE READ THESE INSTRUCTIONS CAREFULLY:
These instructions are for SINGLE LANGUAGE translation and also can be applied to ENGLISH language users who want to just CHANGE TEXT. ENGLISH language users shouldn’t get confused with the word Translation here, as this is the only way to change all default text like many other themes. you can set footer options there
Before proceeding you must check the selected default language from WordPress Dashboard Settings > General > Site Language that matches the language which you are translating in Loco Translate. For example, if you are translating the site into Brazilian Portuguese then make sure the Site Language, Português (Portuguese) is selected.

The above language should match the language (Portuguese) you are planning to create or have already created in Loco Translate.
PART 1: INSTALL LOCO TRANSLATE
STEP 1: Login to WordPress admin dashboard.
STEP 2: Go to Plugins > Add New
STEP 3: Search for Loco Translate, and click Install Now.
STEP 4: Click Activate
PART 2: TRANSLATE THEME
STEP 1: Go to Loco Translate > Themes
STEP 2: Under the Bundle name, select ListingPro
STEP 3: Click on New language
Please you must never Edit Template as it will edit the core file.
STEP 4: Under Choose a language, select a new WordPress language from the drop-down (Example: Portuguese).
STEP 5: Under Choose a location leave default (Author) settings selected, and click Start translating
STEP 6: Select a Source text string to be translated
STEP 7: Type (or paste) the translation (Example: Portuguese) of the selected Source text (English).
STEP 8: Click Save